

Swaging rakers is probably the hardest and most abnormal task in sharpening a crosscut saws. This page looks at some methods that I have used with good success and covers some things I have not seen elsewhere. Other crosscut saw filers or beginners may find some useful ideas here, or maybe not. It is up to each filer to decide what works best for them.
The first question may
be, do rakers need to be swaged? That's a good question, saws will cut
with straight un-swaged rakers. There seems to be no really good answer
but the general opinion of saw filers is that it is worth the effort. It
is interesting to note that of all the two man saws I have seen, about 80% of
the saws have rakers swaged to some extent. On the other hand, one man
saws seem to be the opposite with only about 1/4 of the saws with rakers swaged.
I don't know why.
Raker shape
The
raker is a dual purpose tooth. Since the saw cuts in both
directions, on the push and pull stroke, the shape of the raker will
effect how it works as a leading point and trailing point. Most
people consider how the raker works as a leading point to scoop out the
cuttings but how is performs as a trailing point is just as important.
The trailing tip controls how deep the saw cuts. If the
raker is swaged with a long smooth curved shape it will work very well
to scoop out the cuttings and draw the saw into the cut like a
plane. However the very same raker will restrict how the saw
advances because it will not compress into the bottom of the kerf as
needed for the saw to advance down into the wood. The greater the
distance between the two leading and trailing points of a raker the
more the trailing tip must compress into the bottom of the kerf for the
saw to advance. When compared to traditional saws, modern
competition saw have a very short distance between raker tips and this
is one reason they will cut faster then a tradition saw. So the
best shape of the raker is a trade off. A straight un-swaged
raker will not scoop out the cuttings well but may allow the saw to
advance well. A long curved swaged raker will scoop out the
cuttings well but may restrict the advancement of the saw into the wood.
In the
USFS Crosscut Saw Filer DVD
Warren Miller does a
good job of explaining the process of preparing a raker for
swaging and swaging a raker from the tip and working down the
as the raker bends over to form a uniform bend. However he gives
little to
help to beginning filers on body posture or position during the hammering process.
Where should you stand? How should you hold the hammer?
What kind if hammer?
Before
any hammering to swage a raker the tooth must be shaped properly to
facilitate swaging. In the USFS video Warren states that the
range of the point should be 20 to 30° before swaging. In actual
practice and as shown in the video, 20° would be way too small.
Warren used about 31° in the video and I recommend about 30 to
33° for the angle of the point.
Image from the USFS video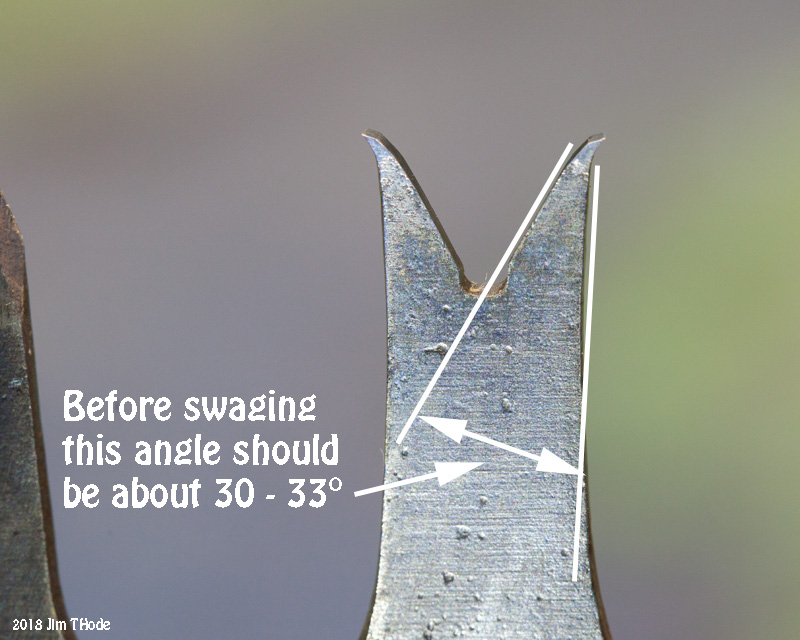
To compound the problem for a beginner, the crosscut saw manual has a photo of swaging that is nearly impossible to duplicate in actual practice. The filer is shown with the hammer in his right hand maybe facing the blade and hammering off to the right. Or, maybe he is standing on the far side of the blade and reaching over the saw. In either case, it is not clear.

To give beginners some ideas, here is a basic posture and some points I think are important. (switch left to right for lefties):
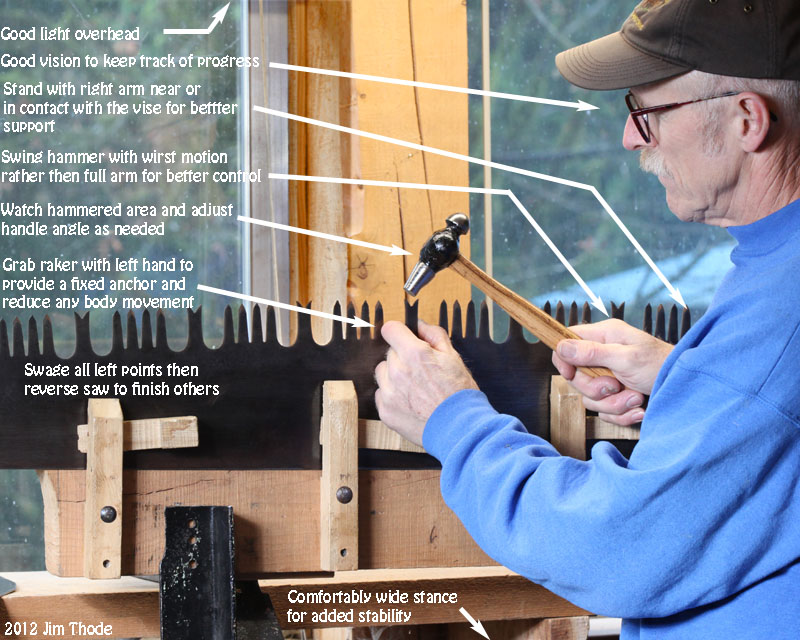
Whatever you do, you should make every
effort to avoid hitting the adjacent raker point. That could ruin your
day.
Here is another option, about the same idea but the vise needs to be lower (or the filer higher) and you hammer from the back side:
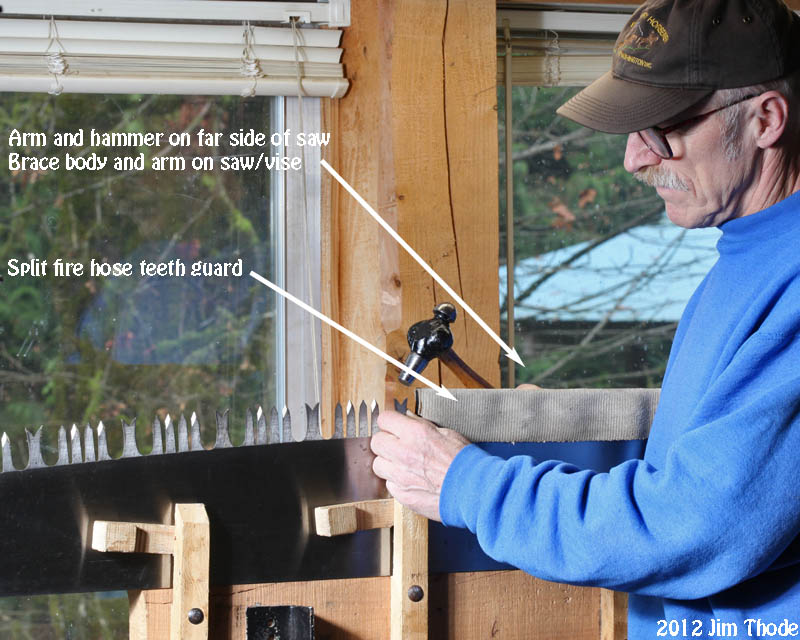
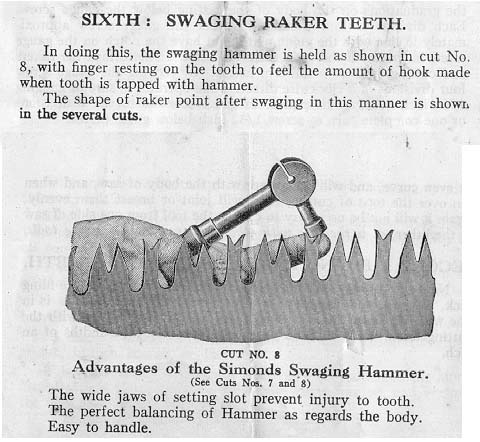
A
vintage Simonds instruction
Others have reported using a swage or length of hard steel between the raker and hammer to eliminate the chance of a misdirected hammer blow hitting an adjacent point.
Others do both raker points in one pass along the saw without having to reverse the saw. Use what ever works for you. If anyone has other ideas, I would be happy to know and maybe post them to give others more options.
No matter what method is used a guard over the teeth is a good idea:

To make the job of swaging rakers even
more vague, the Crosscut Saw Manual has these images:

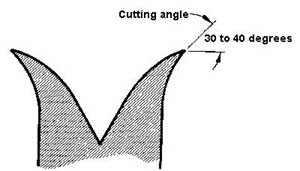
For years I looked at those images and wondered why I can't get my rakers to look like that and why don't I ever see a swaged raker that looks like that. I have come to the opinion that to get rakers to look like that, they have to be stamped with that shape in the factory when the saw was made. You can not take a straight raker and swage to the extent shown in the images and even if you could it would likely be a waste of effort. Only about 1/16" of the raker point is in the wood and that plus a little more to provide curved path for the noodle is all that counts.
Another issue in the above images that raises some questions is the angles. The image on the left indicates that the raker should be bent over about 45 degrees from vertical. In actual practice, this is not normal but doable and about the limit of what can be done with out starting to make the tip too weak. The image on the right indicates that the angle from vertical should be 50 to 60 degrees. (That is 90 - 40 = 50 and 90 - 30 = 60) Not only does it not agree with the image on the left, if a raker point was bent over this much it would be way out of line with what is done in actual practice and be very weak. In some of the photos below I measured the raker angles and reported them as X/Y, where X is the angle from vertical (as in the left image) and Y is the angle from horizontal (as in the right image). To match what is done in actual practice, the image on the right should really read something like 45 to 60 degrees rather then the 30 to 40 degrees. Of course that is not to say that if a raker is bent over less then these ranges that there would be of no benefit. I would guess that any angles greater then a straight/square raker would tend to kick out cut wood better.
Also the above image with the slim-taper file with safe corners, it makes more sense to use a flat file with safe corners for dressing the under side of the swaged rakers. There is no reason to have sharp corners on a flat file but sharp edges on a slim-taper are needed when "v"ing rakers.
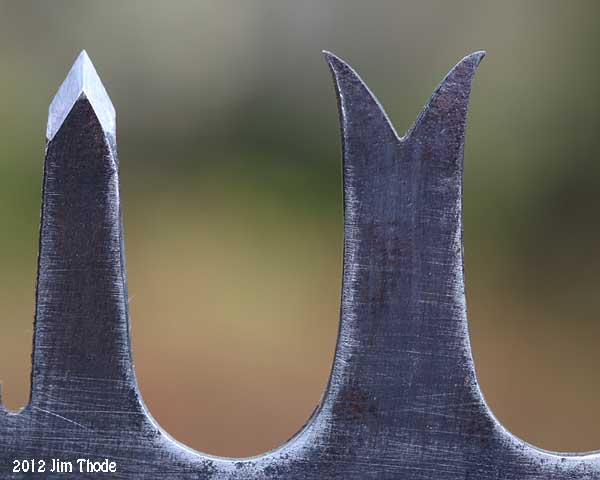
This is a 6' Simons #503 that has had one light sharpening and no swaging.
It is the only saw I have seen that actually has rakers that look nearly
identical to the images in the saw manual. I believe the shape of the raker is the way it
came from the factory. It does seem to cut the same as "normally" (see
below) swaged rakers.
See
it in action.
After the
swaging / hammering to shape the tooth the inside of the point should
be filed back to about 15° from horizontal. If this angle is too
large it will make to point weak and if it is too small the saw will
skid along on the raker tips and not bite into the wood. Many
sloping filing gauges are about this angle but a good job can be done
filing freehand.
Along this same line of what do "normal" swaged rakers look like? I took several photos of real saws with swaged rakers
just to give new filers an idea what real swaged rakers look like.
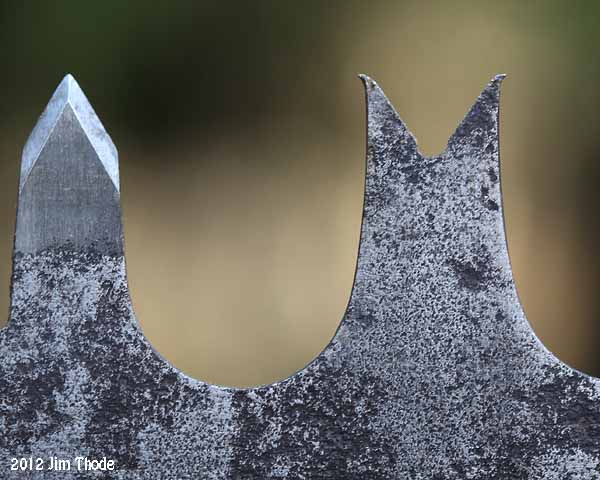
This is a 5' cut off bucking saw with a small swage on the raker tips. Raker angles = 41/49, It cuts very well as below.
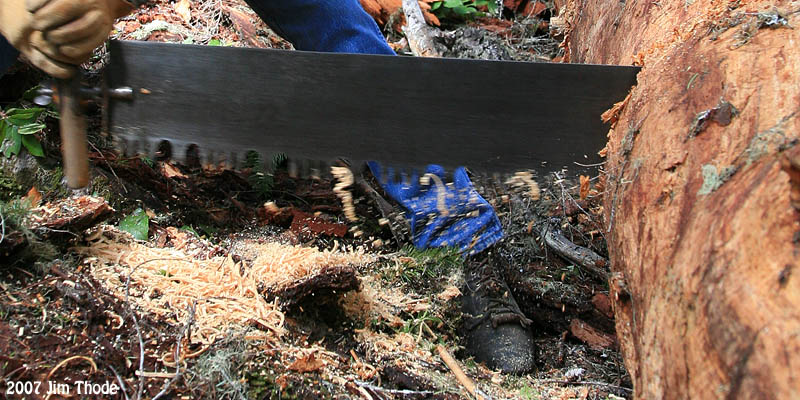

Lightly swaged 5' cut off bucking saw,
cuts amazing noodles.
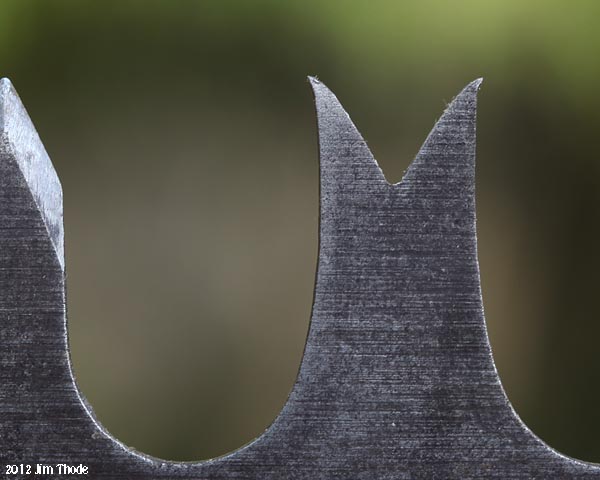
A 5' Simonds 520. Raker angles = 37/53, Click here to see a video of this saw in action.
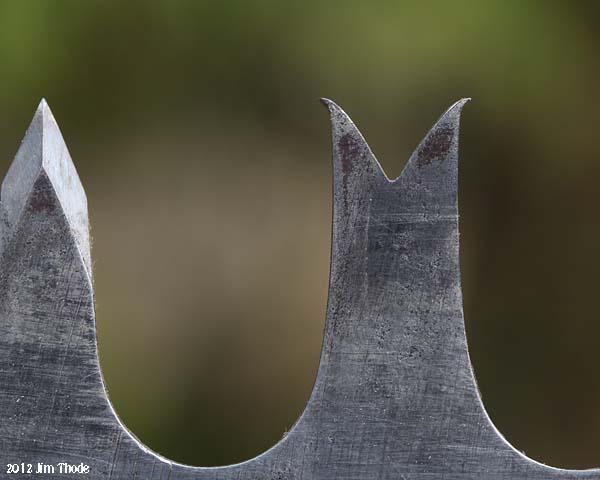

A 7' Simonds 520 Raker angles = 30/60, Swelled raker and moderate swage. Filed for competition.

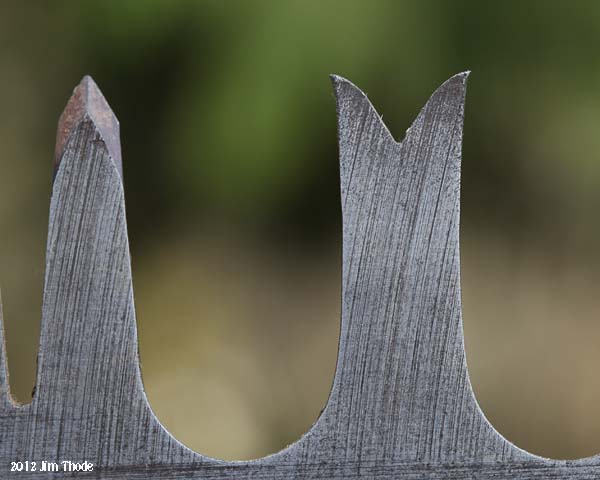
A 7' Atkins #51 Bucking. Stubby swage.
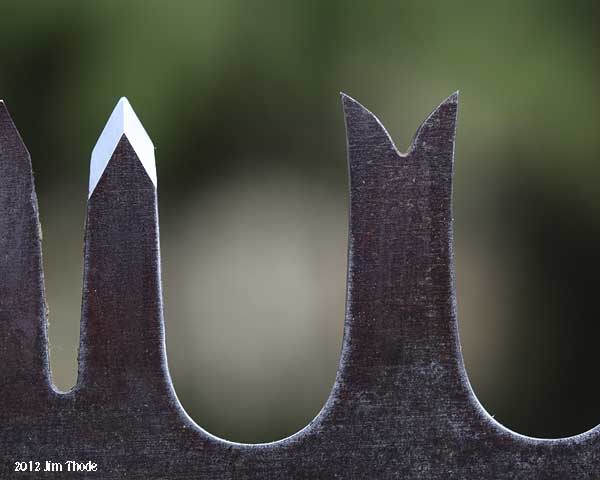
An unknown brand 7' bucking, no swage. Have not cut with it.
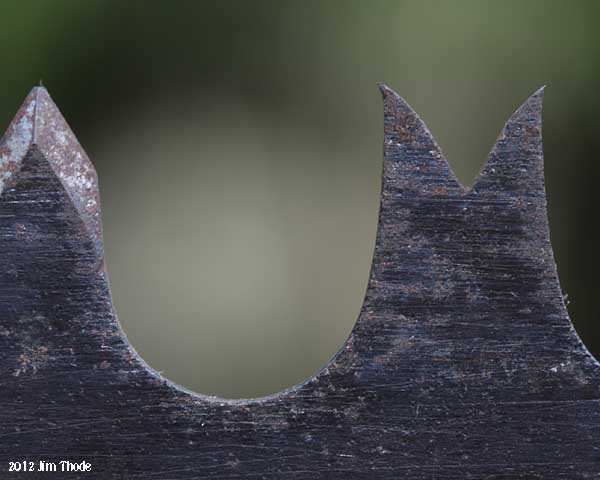
A 4' cut off bucking. Slight swage.
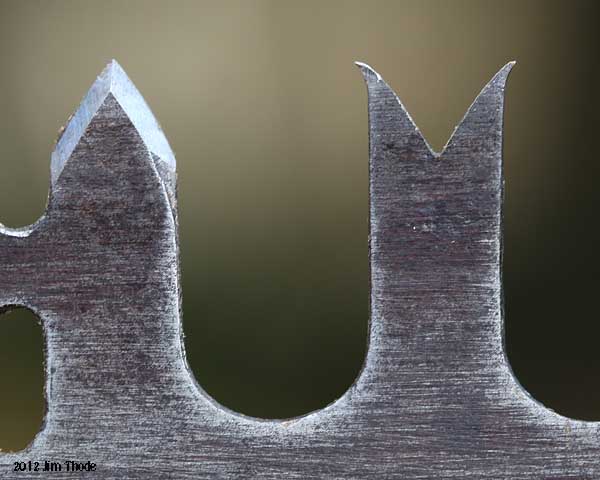
A 48" One Man Atkins saw. Swaged small raker. In action.

A 3' Cut off falling saw. Raker angles = 32/58, In action.
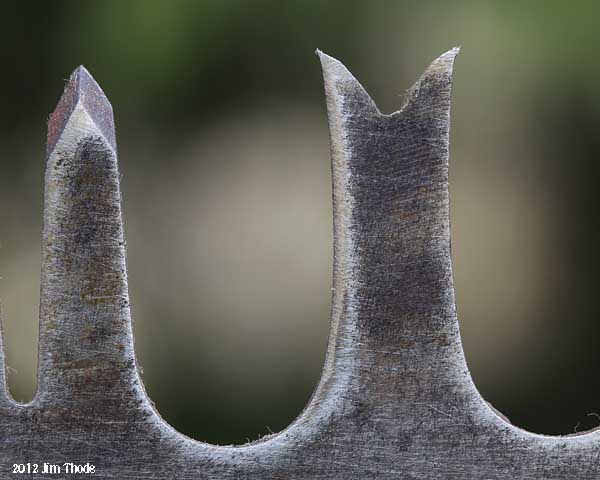
A 7' Simonds 503. More swage on one point then the other.

An unused 3' One Man Powerkraft. Note slight swell of raker.
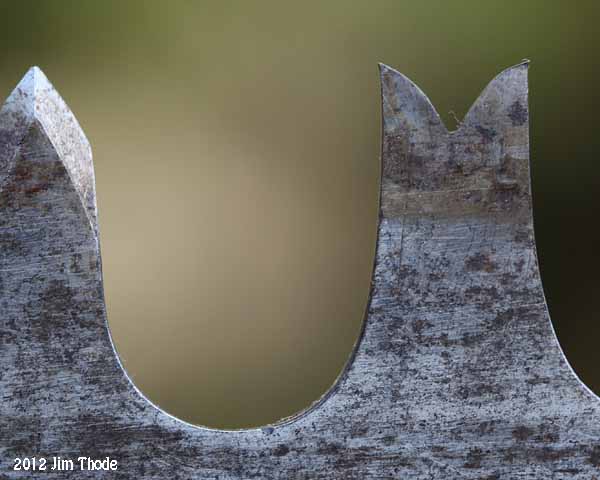
A 48" Topping saw. Very slight swage.
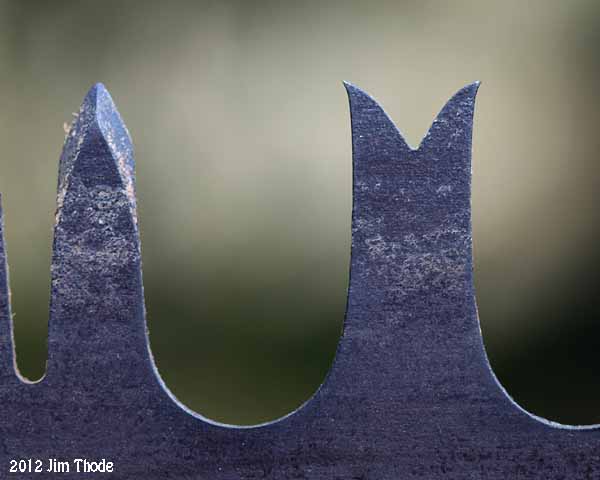
A 6' Falling saw. Nicely rounded swage.
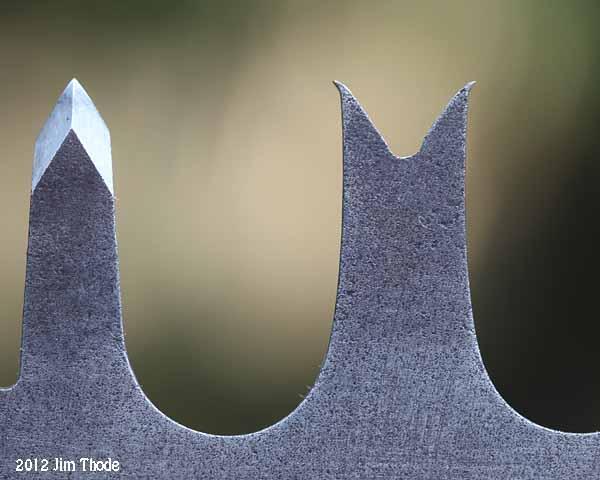
A 6' Simonds #503. Raker angle = 37/53, Cuts very well. Click here to see it in action.

A 48" cut off bucking saw. Small swage but it out cuts any one man saw.
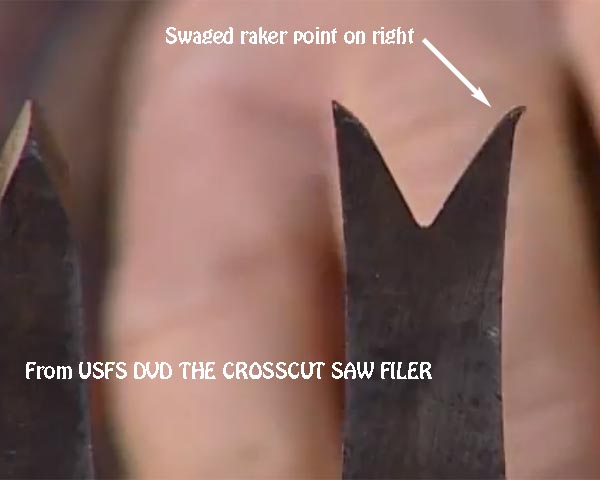
From USFS/ Warren Miller's DVD Raker angles = 40/50
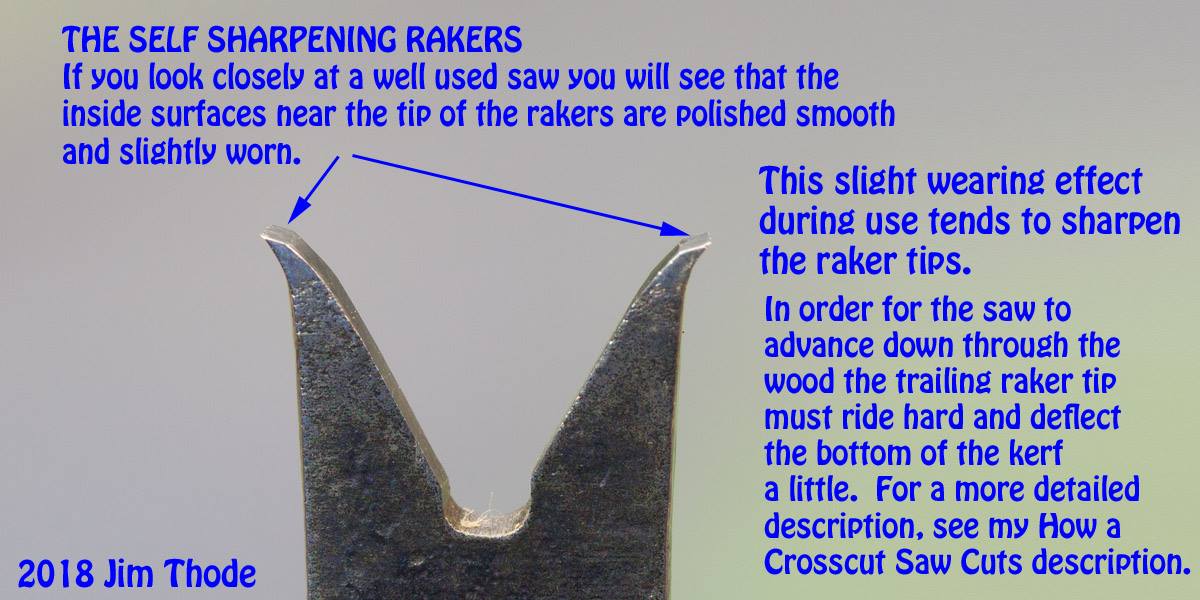
An advantage to raker swaging, they seem to be self sharpening
Swaging tools - What
tools do you need?
The crosscut saw manual and filing DVD covers the traditional tools used to sharpen and shape rakers.
I have found a dial indicating raker gauge to be very handy because it gives a direct reading of the work progress.
This is especially helpful when swaging, you can take a few blows with the hammer and see if and exactly how much progress is being made.
If you do not see any change, maybe a little more filing is needed.
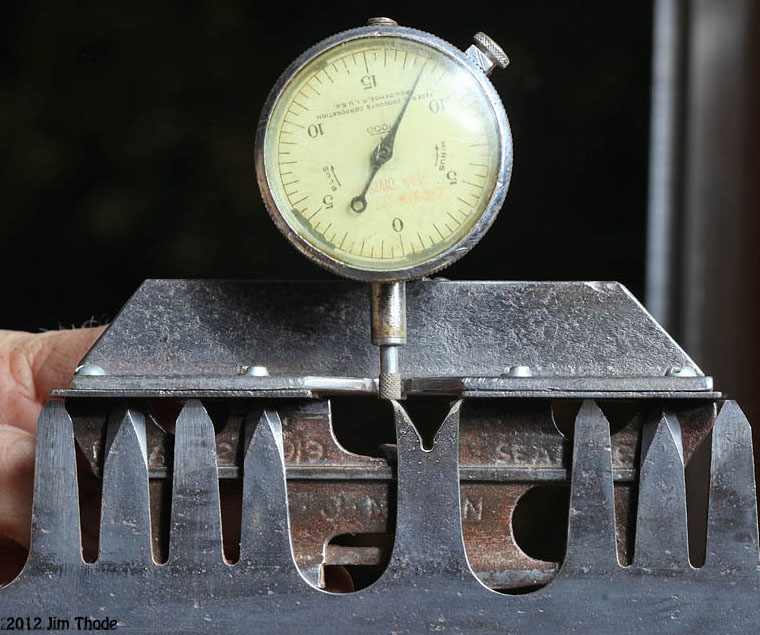
Click here for more photos and enough detail make something like this.
Vintage swaging hammers are rather rare. I modified a ball peen hammer and I believe it works very good.
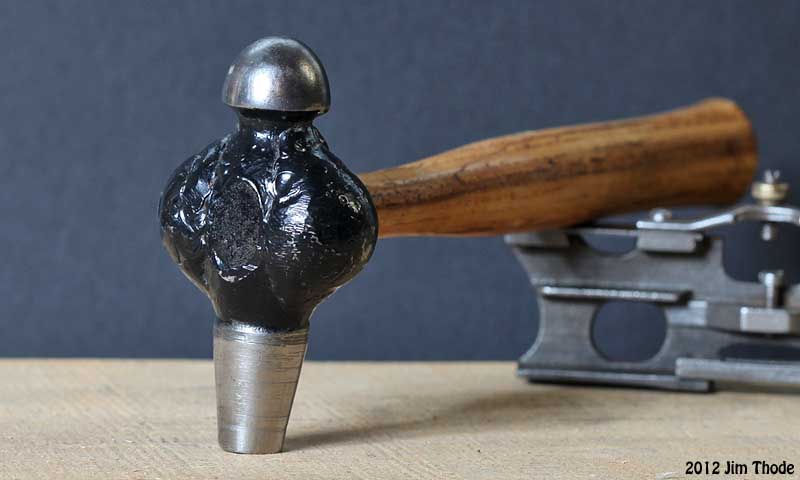
Yes, it looks like "she" is expecting. Click here for more details on this and other swaging hammers.
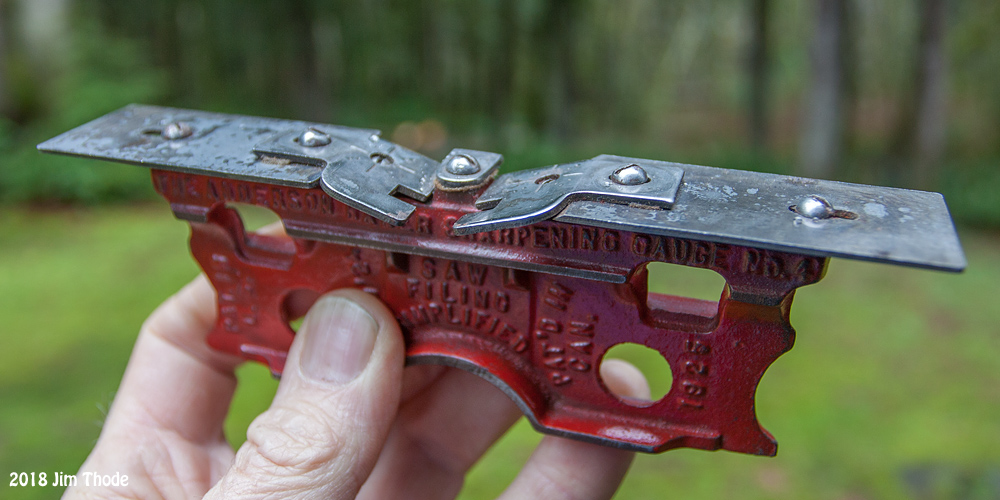

Home made Sloped Filing Plate Raker Gauge. For more details and photos click here
Another bit of
information that may not be clear is, how long does or should it take to hammer
a raker into shape? It has taken me up to fifteen minutes per raker point
to swage from a straight raker to a good swage on heavy quality vintage saws.
That adds up to about eight hours just for swaging rakers on a single saw.
Of course for normal sharpening with a saw already well swaged, the time would
much less and it takes much less time for lower quality, lighter, softer saws.
I don't know how long others take.
For beginning filers, just find an old saw and start to work on it. Learn by doing and ask questions if you have any. Comments, suggestions or questions are always welcome.
Jim Thode